Supplies:
- Two dresses (or a dress and a second layer of material to match)
- White material. We used a white sheet because it already had a casing: PERFECT!:) If you don't have a sheet handy, you can easily modify the instructions.
- Elastic
- Basic sewing supplies
Cut aroung the entire skirt according to your marks, careful to not cut both layers of fabric at the same time.
Secure the side seam stitches on the skirt part that you have cut out. Measure the width of the skirt piece (mine was 24 1/4 in). Fold the side of your white fabric towards the center that much plus an inch for the seam. Subtract the height of your (floral) material from the length from your waist to where you want the dress to end (16.5). Cut your white material that high.
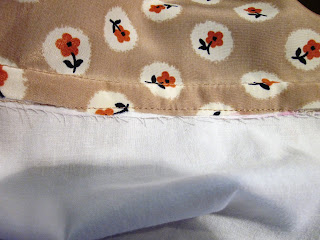
Fold the white in half, right sides together, and sew down the side. Turn right side out. Use a double stitch to keep the non-casing end from fraying. Pin the floral material inside of the white piece, right sides together, and sew. Turn right side out. Sew about half inch above the bottom of the white material, making sure to catch the floral fabric on the other side. This will give it clean finish and insure that the seam will not flip up.
Clean look from the outside (not that anyone will see:)
This is what then entire piece will look like now. Measure your waist and cut that much elastic. Rip a few stitches from either side of the seam of the white material that you made earlier (if you are using a sheet, you are just opening the casing a bit on both sides of the seam).
Sew one side of the elastic as close to the seam as you can. Use a safety pin to thread the elastic through and sew it one the other side. You're finished with the skirt part:)
For the bodice, all that my mom did was fold the straps over about a half inch and whip stitch all the way around to secure it (sorry, I don't have any pictures. She did it without me knowing:)

And now I have a beautiful dress for $12!!!:)


Nice! That totally works. I enjoy discovering things in sewing as well. :)
ReplyDeleteFound you via the DIY Dreamer
Following GFC btw :)
ReplyDeleteLOVE this!! What a fabulous idea! My kids will never outgrow a dress again haha
ReplyDeleteThanks so much for sharing this at The DIY Dreamer.. From Dream To Reality :)
Thank you! My mom is brilliant:) This would be perfect for growing kids!:) Thanks for stopping by:)
DeleteThis is a great! Thanks so much for linking up to our Pinteresting Party!
ReplyDeleteThank you for participating in Show Your Stuff Blog Hop, You are invited to come back:
ReplyDeletehttp://juliejewels1.blogspot.com/2012/08/show-your-stuff-36-taco-casserole.html
what a brilliant way to fix a dress! thanks for sharing. totally pinning this!
ReplyDeleteHugs,
Lelanie