My sisters and I love the store "Romy" in our mall (based out of the Northwest). It has a really boutique-y feel, and there are ALWAYS awesome sales. The other day I found this dress for $5.76! Can you believe it?!?!?! They only had large, but once I saw the tag I didn't really care if it was XXXXXL, I knew it would be fixable;) The bodice was a little bit too loose, and the skirt a little too short, but with two dresses in hand, my mom was able to fix it up pretty quickly:) She pretty much made a slip to extend the length of the dress without actually touchign the dress! She made it look so easy, you should try it!
Supplies:
- Two dresses (or a dress and a second layer of material to match)
- White material. We used a white sheet because it already had a casing: PERFECT!:) If you don't have a sheet handy, you can easily modify the instructions.
- Elastic
- Basic sewing supplies
Measure how much longer you want your dress to be. (I sat down with it on and we decided to add just a few inches, but totaled the floral material to about 13 in. just to be extra safe) Measure from your waist to where you want the dress to end. Using a measuring tape and disappearing pen, mark all the way around the second dress where you want to cut.
Cut aroung the entire skirt according to your marks, careful to not cut both layers of fabric at the same time.
Secure the side seam stitches on the skirt part that you have cut out. Measure the width of the skirt piece (mine was 24 1/4 in). Fold the side of your white fabric towards the center that much plus an inch for the seam. Subtract the height of your (floral) material from the length from your waist to where you want the dress to end (16.5). Cut your white material that high.
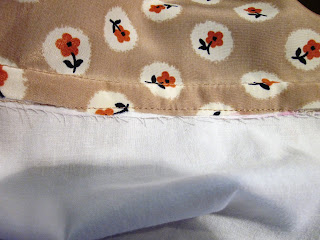
Fold the white in half, right sides together, and sew down the side. Turn right side out. Use a double stitch to keep the non-casing end from fraying. Pin the floral material inside of the white piece, right sides together, and sew. Turn right side out. Sew about half inch above the bottom of the white material, making sure to catch the floral fabric on the other side. This will give it clean finish and insure that the seam will not flip up.
Clean look from the outside (not that anyone will see:)
This is what then entire piece will look like now. Measure your waist and cut that much elastic. Rip a few stitches from either side of the seam of the white material that you made earlier (if you are using a sheet, you are just opening the casing a bit on both sides of the seam).
Sew one side of the elastic as close to the seam as you can. Use a safety pin to thread the elastic through and sew it one the other side. You're finished with the skirt part:)
For the bodice, all that my mom did was fold the straps over about a half inch and whip stitch all the way around to secure it (sorry, I don't have any pictures. She did it without me knowing:)

And now I have a beautiful dress for $12!!!:)


