Showing posts with label Paper. Show all posts

Wednesday, December 11, 2013

DIY: Christmas Tree ( or any other design!) Napkin Rings using Silhouette

 
I had a different post planned for today, but then realized how fun this one would be:)  Plus, the weekly challenge on the Silhouette blog this week is a holiday item, so I needed to squeeze this in before they pick a winner on Friday!  For Thanksgiving I made a bunch of those pumpkin and leaf napkin rings (bottom of this picture) and loved how they turned out!  But I couldn't find any Christmas designs, so I decided to make my own!  To make this, I used the 3d moose and fir trees that were on sale a few weeks ago (but I'm pretty sure you could use any Christmas tree shape...or any other shape, for that matter!)
Open up the file.
 
Since you won't be using the moose and the other part of the tree, you can ungroup and delete them.
Using the knife, draw a line down the center of the tree (there is already a dotted line so you can use that as a guideline).

Pull the two sides of the tree apart.
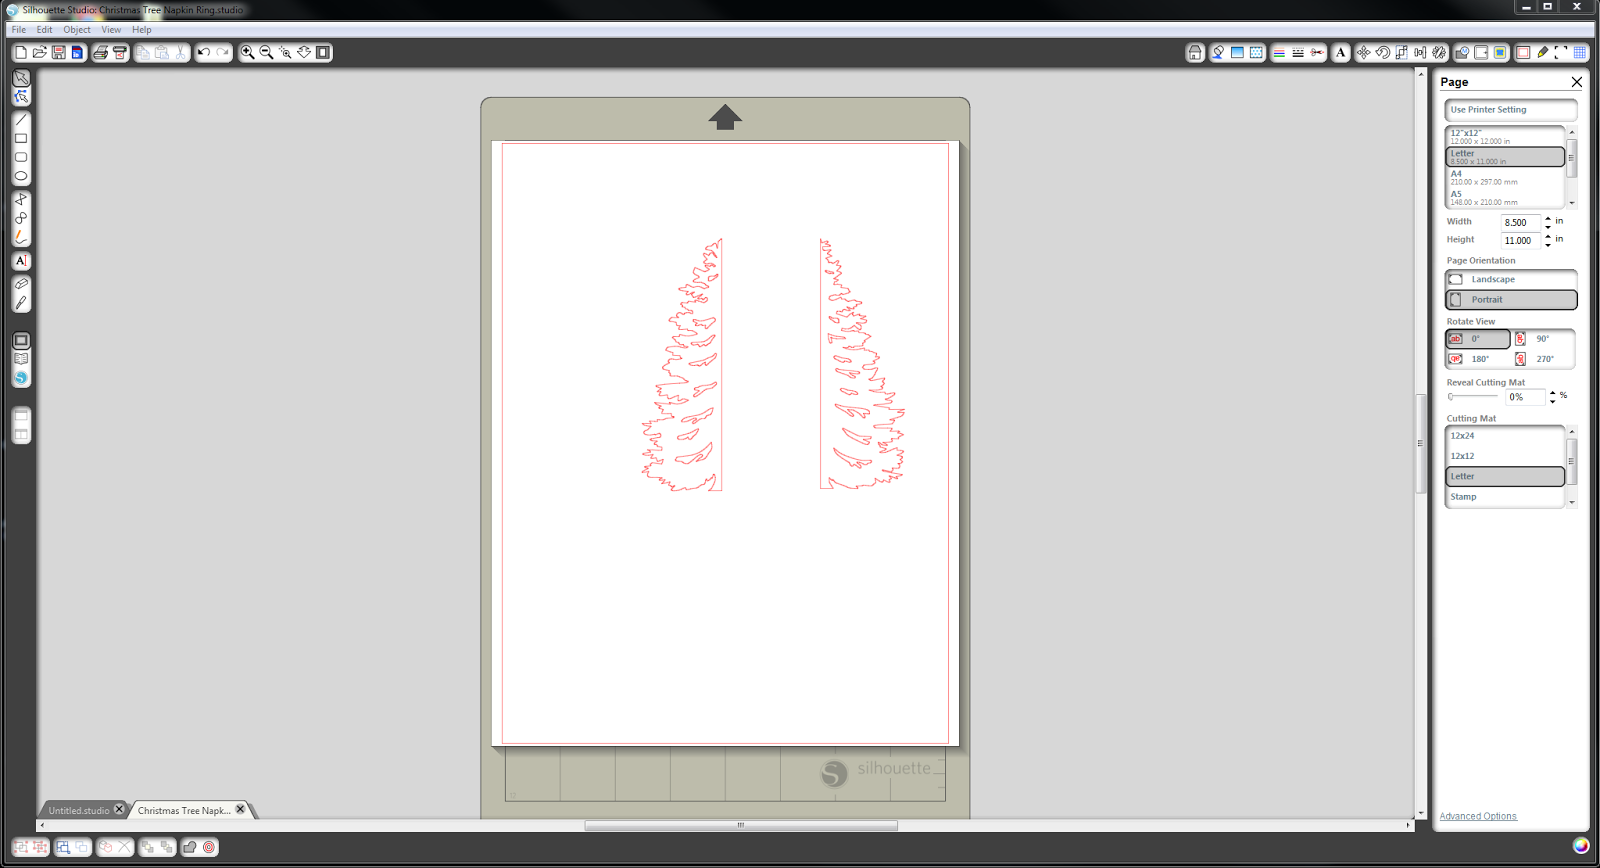
 
Draw a rectangle (for the two sizes of napkin rings that I made, my rectangles were 1.5x5 and 1x3.75).  The size of your tree should not matter to the structure.  It just depends on how you want it to look.
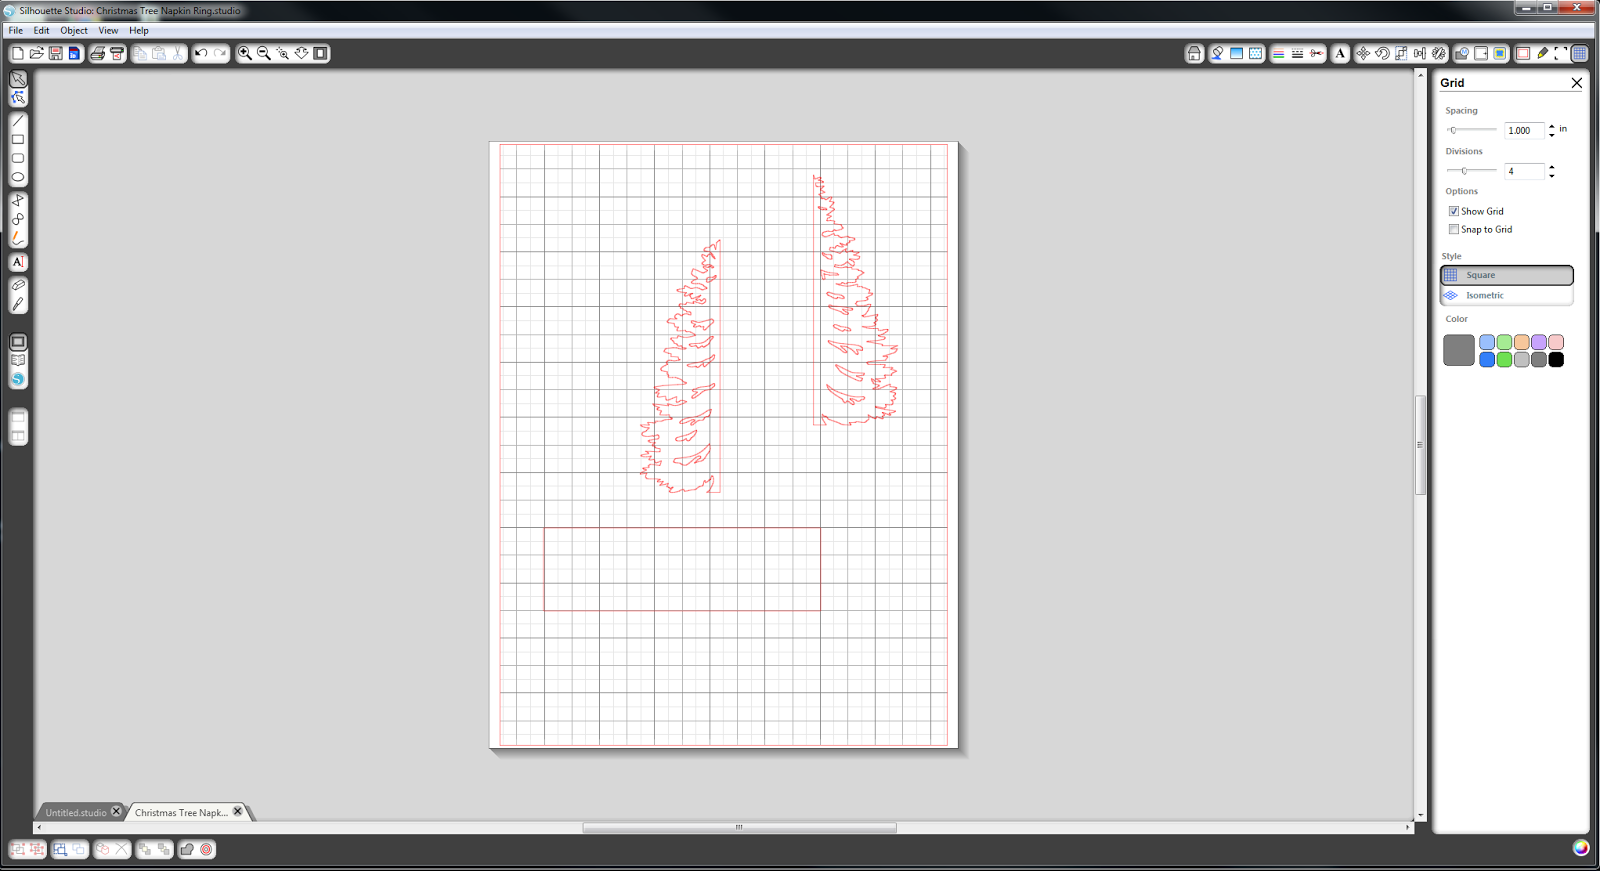
Place the Christmas tree pieces on either side of the rectangle (I suggest using the grid to make sure that they are even).

Highlight all of the shapes and select "merge".  This will only work if the trees line up perfectly on the edges of the rectangle.
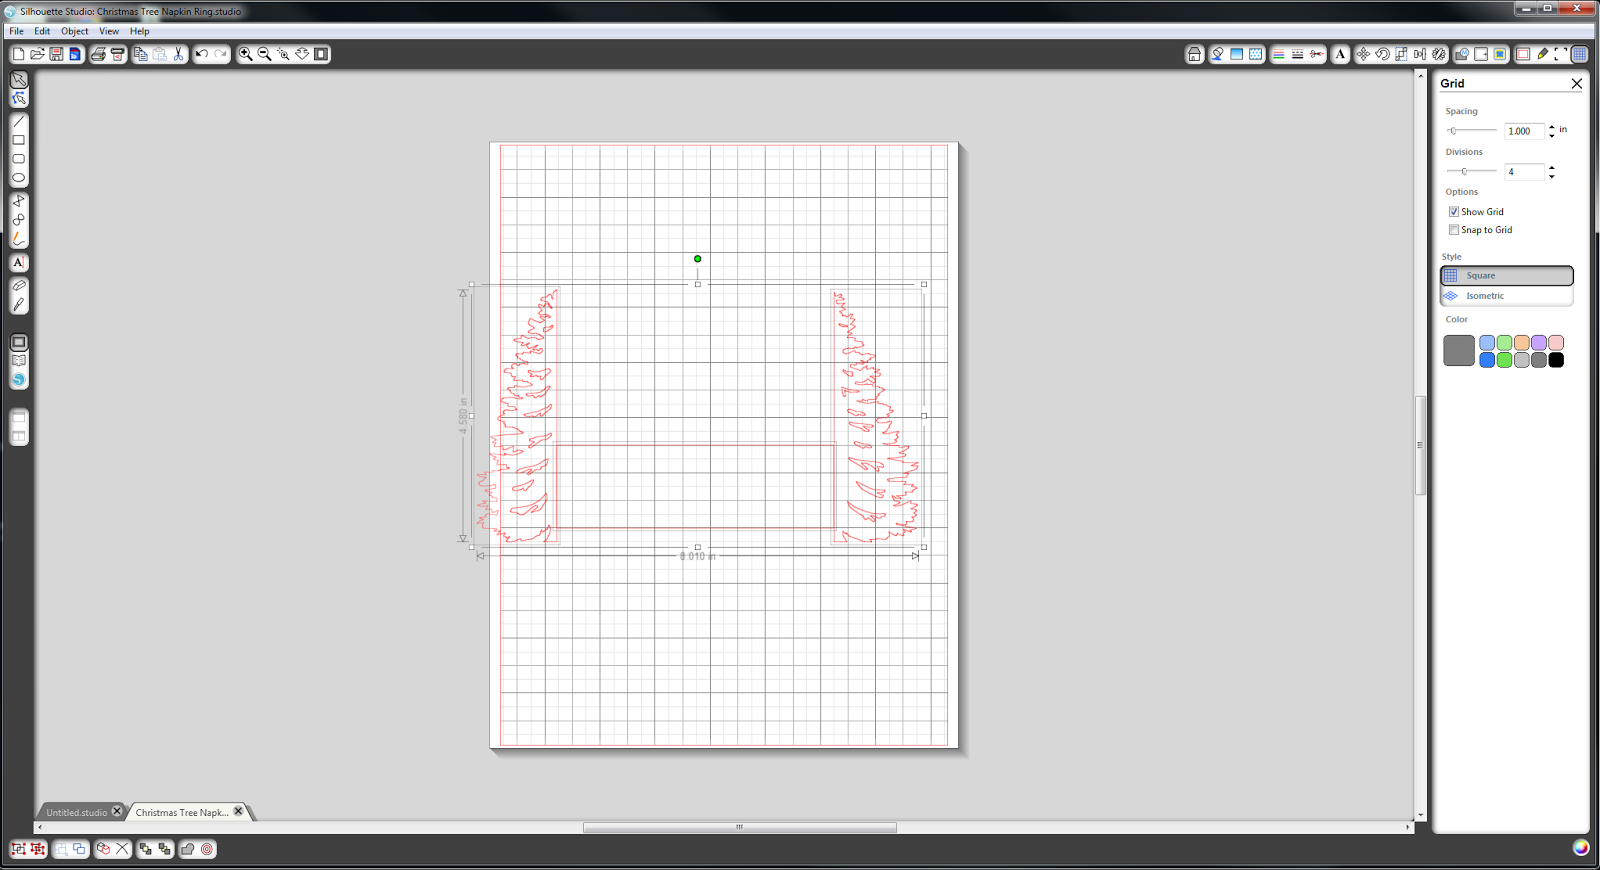
You now have your napkin ring!  Last thing you need to do is add slits.
Using the knife, cut a line from one corner of the rectangle to about 2/3 down and the other corner to about 2/3 up.
Now send to silhouette and cut!  This project is super simple, but easily impresses guests;)

Like I said earlier, I made two different sizes.  The smaller one works for regular cotton napkins, and the bigger one for thicker cloth napkins.
 
 I think this design is perfect for a rustic inspired Christmas!
I would love to see pictures if you make these!
~Kelsey


Monday, November 18, 2013

DIY: Antique Book Pumpkins

 
Well hello there!  Today I have my second of three Thanksgiving posts.  On Saturday I gave you some ideas for name cards, and today I have the perfect centerpiece for your table!

This idea came from a lady in California who passed it on to my sister, who passed it on to me, and now I'm passing it on to you!:)
 
You already know how much I love thrifting, right? What do they say, "Name brands at Walmart prices?"  I'm all for it.  But this thrifting shopping trip with my sister was all for the sake of crafting.  First we picked out some books for our pumpkins.  (I had to go with some vintage ones to get those awesome covers).  We ended up with some old fiction, a German dictionary, books on the Alps, dog attractions in California, and how to groom your poodle......random right?  (Oh, and of course I had to pick up that Sense and Sensibility...who could resist?  But don't worry, we didn't cut it up for a pumpkin.)

And this belt-turned-boho-headband.  (Super simple.  Just pulled a few stitches to remove the buckle and re-glued the leather to cover up the braid).  All for a whopping 99 cents.

 Alrighty.  Enough about my love for thrifting.  On to the pumpkins.  To begin with, remove the cover from your book.  It is easiest with paperbacks, because you can just slowly rip it off.  Just make sure to not break the binding.  Next, draw half of a "pumpkin shape" on the first page of the book.  Cut through a few pages with your scissors.
 

Once you have cut the first layer, trace that outline onto the next page and cut a few pages.  Continue doing this until you have gotten through the whole book!

As you are cutting, try to make sure that your pages are not getting bigger or smaller.

It will be hard to cut close to the seam of the book, but don't worry.  You can cut all of that off at the end.
As you can see, you'll be cutting through a lot of paper!!!  When you have cut through your whole book, hot glue gun the front and back cover of the book together.  (Cover the entire page with glue so that it will stick really well).  When that glue has dried, glue a short stick into the hole on top of the pumpkin (see pictures below).  And now you have an adorable little pumpkin!


For this centerpiece, Lara spray painted some big fall leaves gold and sprinkled nuts and pinecones around.


Don't you just love how a little gold spray paint can add some sparkle to any project?


Do you have a Thanksgiving centerpiece made up yet?


~Kelsey
 
Linking up:
More the Merrier Monday

Photobucket


Saturday, November 16, 2013

DIY: Thanksgiving placecards


Hello there!
Today is the first of (hopefully) a few Thanksgiving posts coming up.  Once everyone was done with Halloween, they seemed to all jump straight to Christmas.  But we forgot Thanksgiving!!!  So I hope to inspire you with a few last minute projects:)
My sisters and I were scrolling through my Christmas Pinterest board last year before Thanksgiving, and one sister pointed out that we should try our hand at these little cuties! Lara had recently been collecting a bunch of evergreen branches for a Christmas tea, so we just headed out to our woods and grabbed some sticks really fast.  We got some thicker ones for the base, and some with pineneedles for decoration.
For the base, we cut the thicker ones into pieces (4 - 4 1/2" was about perfect).

The best ones were the ones with nobs and different mosses and lichen growing on them:)


We raided Lara's scrapbook papers.....

And used my "Smash" stamp to add the date on the bottom.

We glued the leaves onto a few of them for extra decoration.


(I didn't get any pictures of the actual process because Lara was moving too quickly;)  But just put a line of hot glue on one branch, smoosh the paper on, add a line of hot glue to that, and press the evergreens and other branch on.  (and yes, smoosh is a technical term;)

 
Here is another placecard that I made....with my handy-dandy Silhouette;)  I probably won't be making these for Thanksgiving because they kinda took FOREVERRRRRR.  But I do like how they turned out:)

 
What are your Thanksgiving plans?
~Kelsey
 
Linking up:

More the Merrier Monday
Sweet Anne Designs - Sweet Sharing Monday


Sunday, June 23, 2013

Silhouette Project: Potluck Sign

Well, I reached a very special milestone on Thursday: I made a recipe from my BAKING board on Pinterest.....for the very. first. time.  I was so excited!  When asked to bring a few dozen cookies to a function, I determined that, instead of making that same old recipe for the thirtieth time (gingersnaps anybody?), I would try something entirely new.  Not just someone's gramma's "world-famous" chocolate chip cookie (now don't get me wrong, I love me a good chocolate chip cookie), but instead something that jumped out of my screen and said "!!!POW!!!"  And, well, these definitely fit the bill.  I'm a major sucker for snickerdoodles.  No amount of self-control can keep me away.  And when I saw this twist on the classic recipe, I was intrigued to say the least.  White chocolate pretzels?  Sign me up, I said.  These cookies should be illegal......or mandatory.  They're that good.  So good, in fact, that they needed a proper introduction.  So, I put #paigetheportrait (yep, "she" has "her" own hashtag) to work and whipped up this little sign!  Super simple and perfectly practical!  (Don't worry: I saved it because I'm SURE I'll be making plenty more batches of these cookies).  And so, bloggyland, here I give you my first "tutorial" using the Silhouette Portrait.  I hope it is the first of many!


Open up your Silhouette program (duh.) and create a new page.  Using the drawing tool, create a square/rectangle.  You don't have to get it perfectly the first time because you can adjust the shape and size.  I decided that I wanted mine to be roughly 4"x6", but decide what is best for you.
 
For this project, I used "Bookman Old Style" font.  Since I knew these letters weren't going to be huge, I wanted a font that would be easy to peel off.  Center the letters in your rectangular shape, and play with them until they only fill up the BOTTOM half of the rectangle.  Then, put your Silhouette to work!!!  Although you can just leave fold it in half and leave as is, I wanted to add a pop of color to this project.  Since the party was "America" themed, I decided on a sturdy piece of red cardstock for the background.  Instead of cutting pieces out just to cover the words, I decided to incorporate the red into the stand.  Use glue (I used a regular old glue stick [ha!] ) to secure the red on the back of your sign (in the end, I did not fold it exactly in half).  TADA!  You're sign is done!
 

This is the prefect project for summer parties, potlucks, etc.  And make sure to try out the recipe for these scrumptious cookies!!!

~Kelsey