Showing posts with label Guest post. Show all posts

Saturday, April 13, 2013

Guest Post: Spring Chick


Today we've got another guest post for you!  Even though Easter is over, there is still so much spring to be had!  And this little chick will brighten up any room:)  As always, feel free to send pictures if you crochet this!
 
Cute Little Chick
an amigurumi design by Nerdybirdycrochet


Supplies:

~G hook

~Worsted weight yarn in any two colors (I used Red heart super saver. Rough on the hands but they

have a nice selection of plain colors...)

~Small scrap of black yarn or embroidery floss

~oh, and some stuffing, but you probably had that figured out already:)

Abbreviations:

~sc..........single crochet

~inc........two single crochets in the same stitch

~st..........stitch/stitches

~ch.........chain

~dec.......either a sc2tog, or an invisible decrease, whichever you prefer.

~dc.........double crochet

Notes:

~This is worked in the round as a spiral.

~It uses the magic circle technique.

~ Stitch count only matters up to the eighth round. From round 9 and on it doesn't really matter:)

Pattern:

Head/body (make one):

R1: In magic circle, do six sc.

R2: Now, close that magic circle! Now, without turning, inc around. Yay, you've got 12 st around.

R3: Now, you've got to remember this sequence: *Inc in next st, sc the next st after that.* Go around

the whole round with that sequence and you should end up with 18 st.

R4:*Inc in next st, sc in each of next two st after that* around. You should end with 24 st! :)

R5-7: Just straight sc'ing. No fancy sequences to remember! Just keep crocheting.

Uh-oh...I see your circle slowly flipping itself inside out...quick! Change it to the right side out! Oh,

confused, are you? ...Never fear, here's a really, really handy linky:


R8: Some decreasing coming right up...*1 dec, sc in each of next two st after that* All the way around.

You should now have 18 st!

R9: sc in the next eleven stitches, then inc in each of the rest of the st. You should have 25 st around.

R10: sc in the next 12 st, and and inc in the rest. You *should* have 38 st here. If not it doesn't matter:)

Woah- before we move on, take some stuffing and stuff your little piece to death.

R11-13:sc around!

R14: 6 dec, then sc the rest of the way around.

R15: sc around

R16: sc first st, 4 dec, then sc the rest of the way around.

R17: sc about 12 or 13 st to where the little tail will be. Pinch off approx. 6 st and sc them together, like this:


See what I did there? I stuck my hook into TWO stitches! Now what I did was sc each of the next few st, except stick your hook into two layers, as shown, until you get to the end.

Then turn and slip stitch back across what you just did. (approx. 3 slip stitches. No ch 1 needed.)

Now continue going around like you just took a detour and

R18: Just dec until you have a small hole about 5 to 7 st around, cut your yarn, and close the hole with the tail you left.

Good job!!!!! You've just completed the head/body!

Now we move onto the wings....

Wings (make two):

Using main color.

In Magic Loop, do one sc, 2 dc, and one more sc. Close Magic Loop.

R2: ch 2, and turn. Dc into first st, then two dc in all the rest. Cut yarn leaving a tail long enough for sewing.

Yay, that was easy! One more thing- the feet.

Feet(make two):

With contrasting color, ch 6

R1: sk first two ch from hook, sc next ch and all the rest of the ch in this row.

R2: ch1, turn. Sc next 3 st, ch3, and turn.

R3: sk first two ch from hook, sc the third ch and the rest of the row.

R4-5: repeat rows 2+3.

break off, leaving tail long enough for sewing.

Assembly

Sewing the parts:

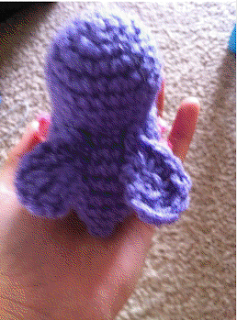
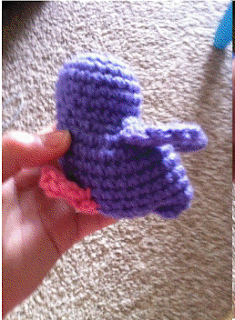
Refer to photos for wing and feet placement. Weave in unnecessary ends when finished.


Ok.. hopefully you figured out that the little pointy tip you made by sc two layers of crochet together, is the tail. The smaller rounded end is the head.

So do you see how it's supposed to be, now?  Good! :D soon comes the facial embroidery.

Embroidering the facial features:

With a scrap of black yarn embroider a simple V-shape for the eyes.

Cut a small diamond with felt and sew it on the bird.

Done!
 

I really hope you enjoyed making this! I know I did!

Please comment on ravelry if my instructions were unclear.

All photos and pattern copyright (c) Nerdybirdycrochet. You may sell items made from this pattern if you wish, but not the pattern itself. Thank you.


Wednesday, February 6, 2013

Guest Post: Hello Kitty Coffee Cozy Pattern

 
Hello all! Today I have another adorable crochet pattern from one of our guest bloggers! For all you Hello Kitty fans out there, this is the perfect accent to your coffee cup. Now you can keep your hands from being burned on your hot drink, and do it in style!


G hook
Worsted weight yarn (I used red heart super saver)
Black felt

Cozy:
Chain 37. Join with a slip stitch.
Sc around (36)
Sc around for 11 rounds
Sc a few stitches, 6 Dc in next stitch, sc 11 more stitches, 6 Dc in next stitch, sc remaining stitches. Break yarn. Weave in ends

Bow: chain 6
Sc for 11 rows
Break yarn
Weave in ends
Cut a LONG piece of yarn and wrap it around the middle of the red strip so it looks like a bow. Leave enough yarn to sew with. Thread the needle and run the needle under the yarn you just wrapped around and sew to the cozy. Bring the needle back out and repeat a couple times till secure.

Cut felt eyes and hot glue onto cozy. Either embroider or cut a piece of felt for the nose. Embroider on whiskers. GO BUY SOME COFFEE!:D
 
Please let us know if you have any problems with the pattern.  And, please, PLEASE! send us pictures if you crochet this cozy:)

Please do not in any way sell this pattern or the coffee cozy.  "Hello Kitty" is copyright of Sanrio.


Linking up at:

Tuesday, January 29, 2013

Guest Post: crochet leafy headband

Here is another crocheting post from a friend at church.  (She's the one that made me the crochet bracelet)  Nadia created this awesome headband, and wanted to share it with all of you! 

:::::This is a pattern for a headband. I used a fingering weight yarn and a size E (3.5mm) hook.
Gauge is not necessary!! Yay!

This headband is worked in "segments" that are all made as you go, so there is minimum sewing required.
Abbreviations:
Ch-chain
Sc- single crochet
Inc: two sc in the same stitch

St-stitch
Sk-skip
Sl st-slip stitch
Dc-double crochet

To get started, ch 10.
Rnd1: In the second chain from hook, do a sc, and sc the rest of the row across. In the last stitch, do an inc (two sc in the same st), and work in sc in all of the back bumps. Again, in the last stitch of the row, do an increase. By now you should have twenty stitches. If not, that is fine, because the pattern works with any number of stitches.

Rnd2: Sl st in first st, then a sc in the same st (the one you just Sl st in). Then ch 1, and sc into the next st, *ch1 again and sc in the next stitch* Repeat what is inbetween * and * around. When you come to the last st do not ch 1.

Rnd3: Sl st into next sc, ch 3, and double crochet into the first ch space. *Sc in next sc, ch3, dc in next ch space*, and repeat what's in between the * *'s the whole way around. In the very last st, just sc, then Sl st in the same st.


Next segment:
Without finishing off,
Ch 10, and repeat rounds 1-3 for each segment. To make next segment, ch 10 and repeat, making more segments until headband is desired length.

On the very last segment, ch 1 and finish off. Using the tail ends, sew the headband into a circle and weave the ends in.

Tips-
•Every time you start a new segment it is quite fiddly. Do this part slowly, the time it takes will be much less than if you had to rip out everything.
•A yarn that changes color often looks great. Also, try experimenting with larger yarns such as worsted weight. You might like the chunkier feel!
• Instead of sewing the ends together, you might want to add a hairband to provide stretch.
• If you do not want it to twist at all, blocking or ironing the headband would be a good idea. That is what I did. However, if you like the natural twist, you don't have to iron/block.
•Also, to provide more stretch, I connected the two ends with an i-cord. Here is a tutorial on how to do one: http://www.planetjune.com/blog/narrow-pointed-tubes-for-amigurumi-video/
•this headband is not stretchy, so you hafta kind of fit it on your head as you go:)


And you're done! Congratulations! Hopefully this made sense as it is my first pattern! :::::
 
(If you have any questions, please leave a comment or e-mail me at fancythatnotion(at)gmail(dot)com.  Also, if you make this headband,  please send me a pic!  We would love to see what you make:)

Please do not sell this pattern.  You may sell the headband if you give credit to the pattern.  Thank you!


Linking up at:

Guest Post: Crochet Tea Bag


Today, we are featuring a crocheted project that was designed by a dear friend of ours! :)  This adorable little tea bag is the perfection addition to anyone's amigurumi collection. [If you don't know amigurumi, look it up on Pinterest!]  Any tea lover will get a smile out of this little guy.
 
I hope to be sharing some more crochet patterns on the blog this week. Keep an eye out!

 
Ch 12
Sc across (11)
Sc across other side of chain (22)
Sc around for 7 rounds (22)
Add face
Switch to white
Sc around with 2 dec (20)
Sc around with 1 dec (19)
Sc around with 2 dec (17)
Sc around with 2 dec (15)
Dec around with 1 sc
Stuff lightly-don't stuff too much or it won't have the right shape.
Flatten the top of the tea bag and sc across to close the hole (3-4)
Break yarn and weave it to the middle stich at top so it can be the "string."
Staple a piece of paper to the end to make the tag.
Update: Evenly space out the decreases.  Put some at the front of the tea bag, some on the sides, adn some in the back.  Don't put  them all in one spot.
PInch the sides and bottom of the tea bag to create the desired shape.
 
 
Please do not sell this pattern or the finished product in any way.


 Linking up at:
Mom 4 Real Kitchen Table Art Sew Can Do CRAFT I Should Be Mopping The Floor Claire Justine It's So Very Cheri Say Not Sweet Anne A Pinch Of Joy