

I had a different post planned for today, but then realized how fun this one would be:) Plus, the weekly challenge on the Silhouette blog this week is a holiday item, so I needed to squeeze this in before they pick a winner on Friday! For Thanksgiving I made a bunch of those pumpkin and leaf napkin rings (bottom of this picture) and loved how they turned out! But I couldn't find any Christmas designs, so I decided to make my own! To make this, I used the 3d moose and fir trees that were on sale a few weeks ago (but I'm pretty sure you could use any Christmas tree shape...or any other shape, for that matter!)

Open up the file.

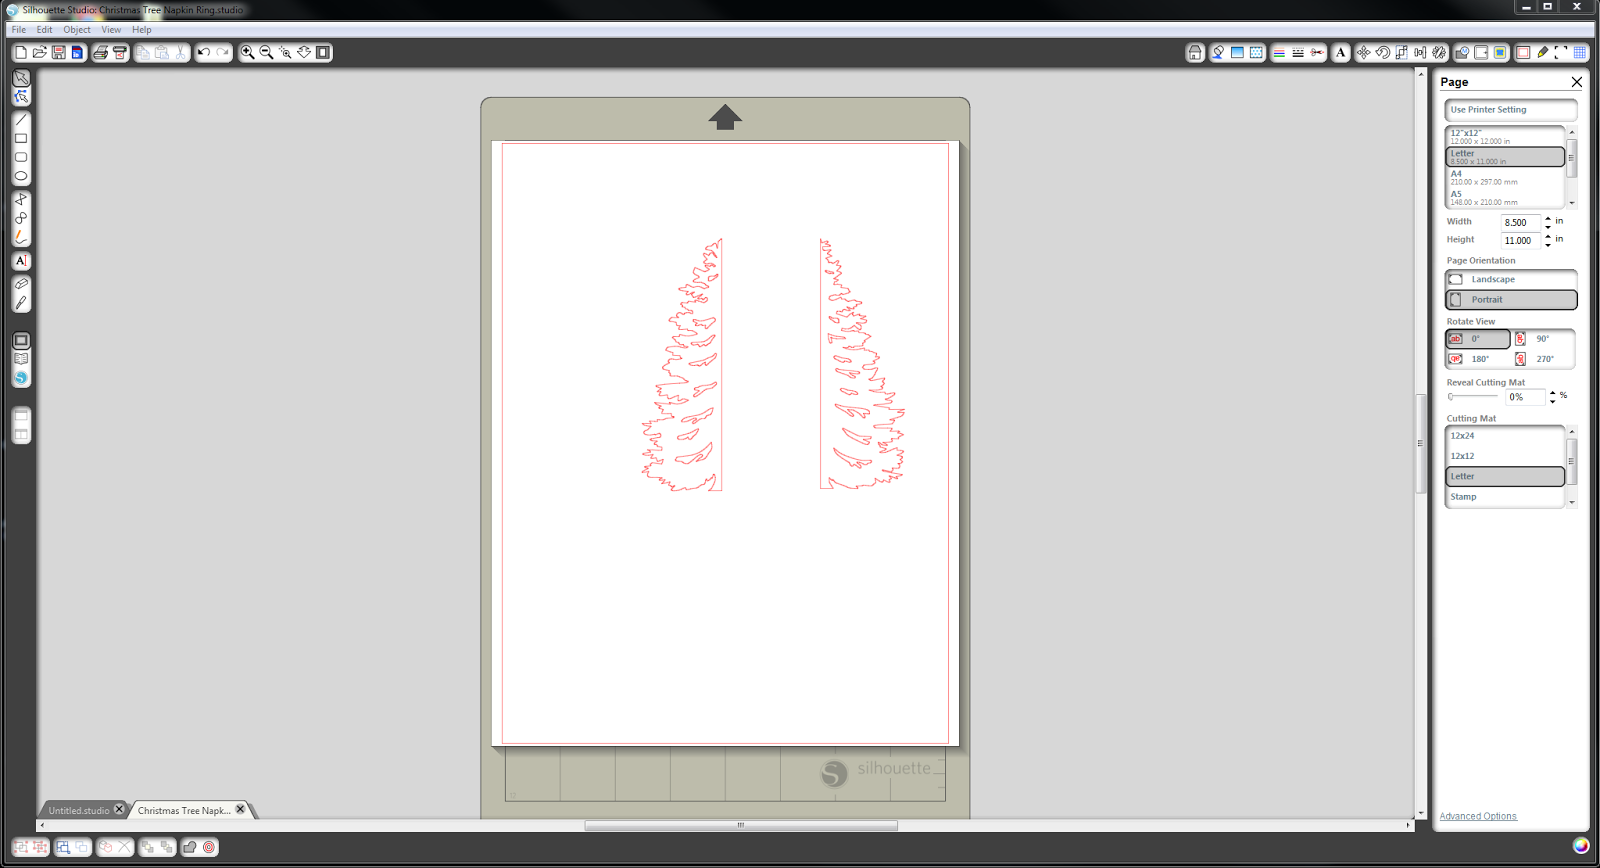
Since you won't be using the moose and the other part of the tree, you can ungroup and delete them.

Using the knife, draw a line down the center of the tree (there is already a dotted line so you can use that as a guideline).

Pull the two sides of the tree apart.
Draw a rectangle (for the two sizes of napkin rings that I made, my rectangles were 1.5x5 and 1x3.75). The size of your tree should not matter to the structure. It just depends on how you want it to look.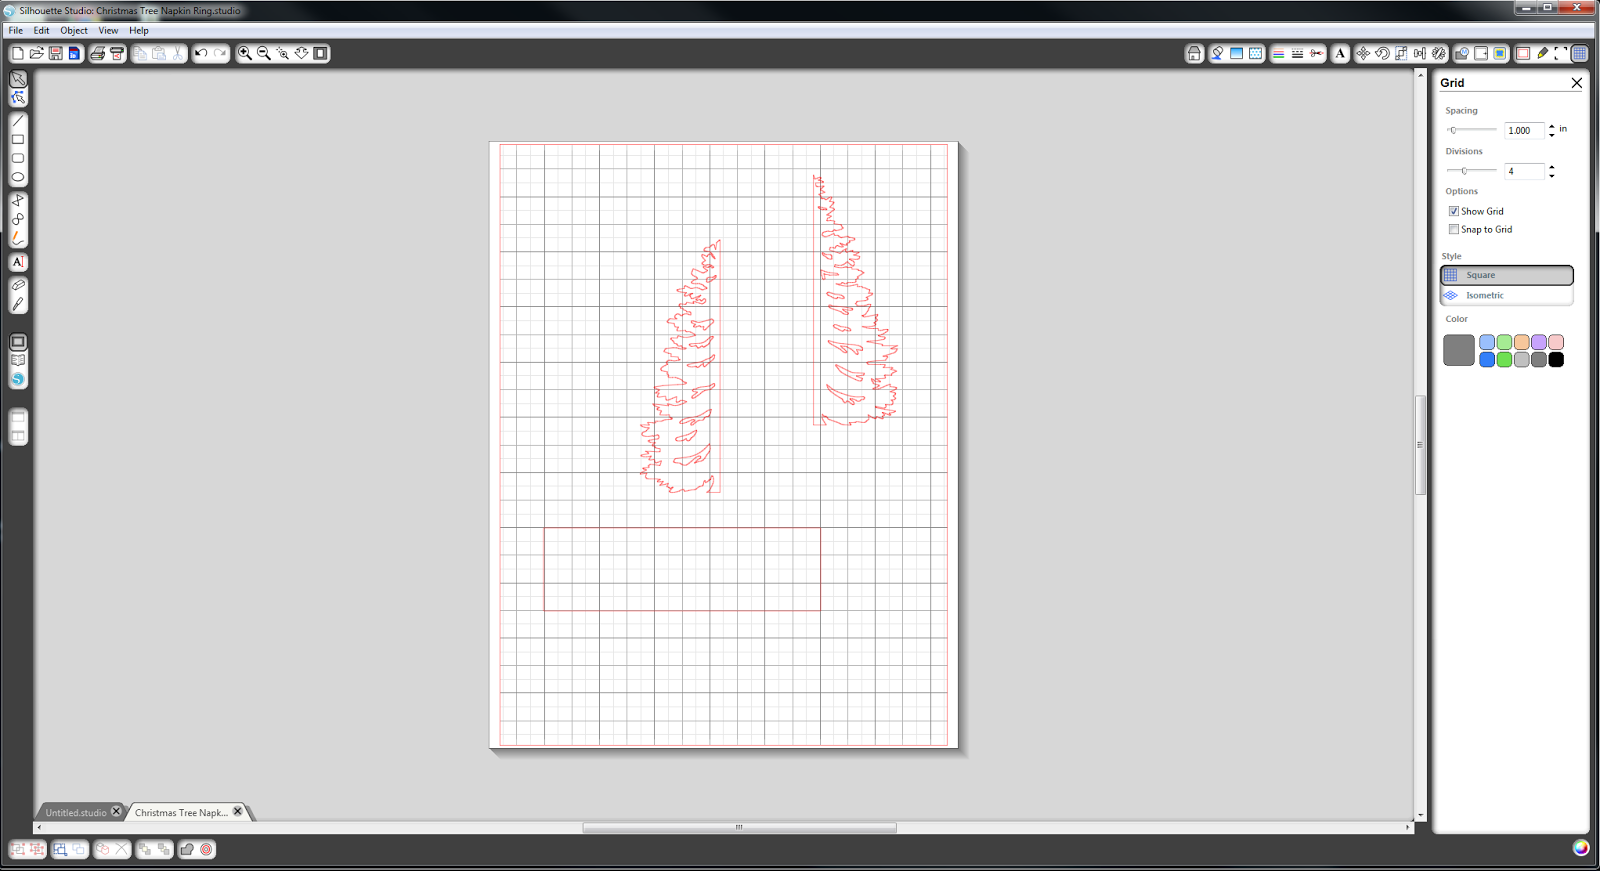
Place the Christmas tree pieces on either side of the rectangle (I suggest using the grid to make sure that they are even).

Highlight all of the shapes and select "merge". This will only work if the trees line up perfectly on the edges of the rectangle.
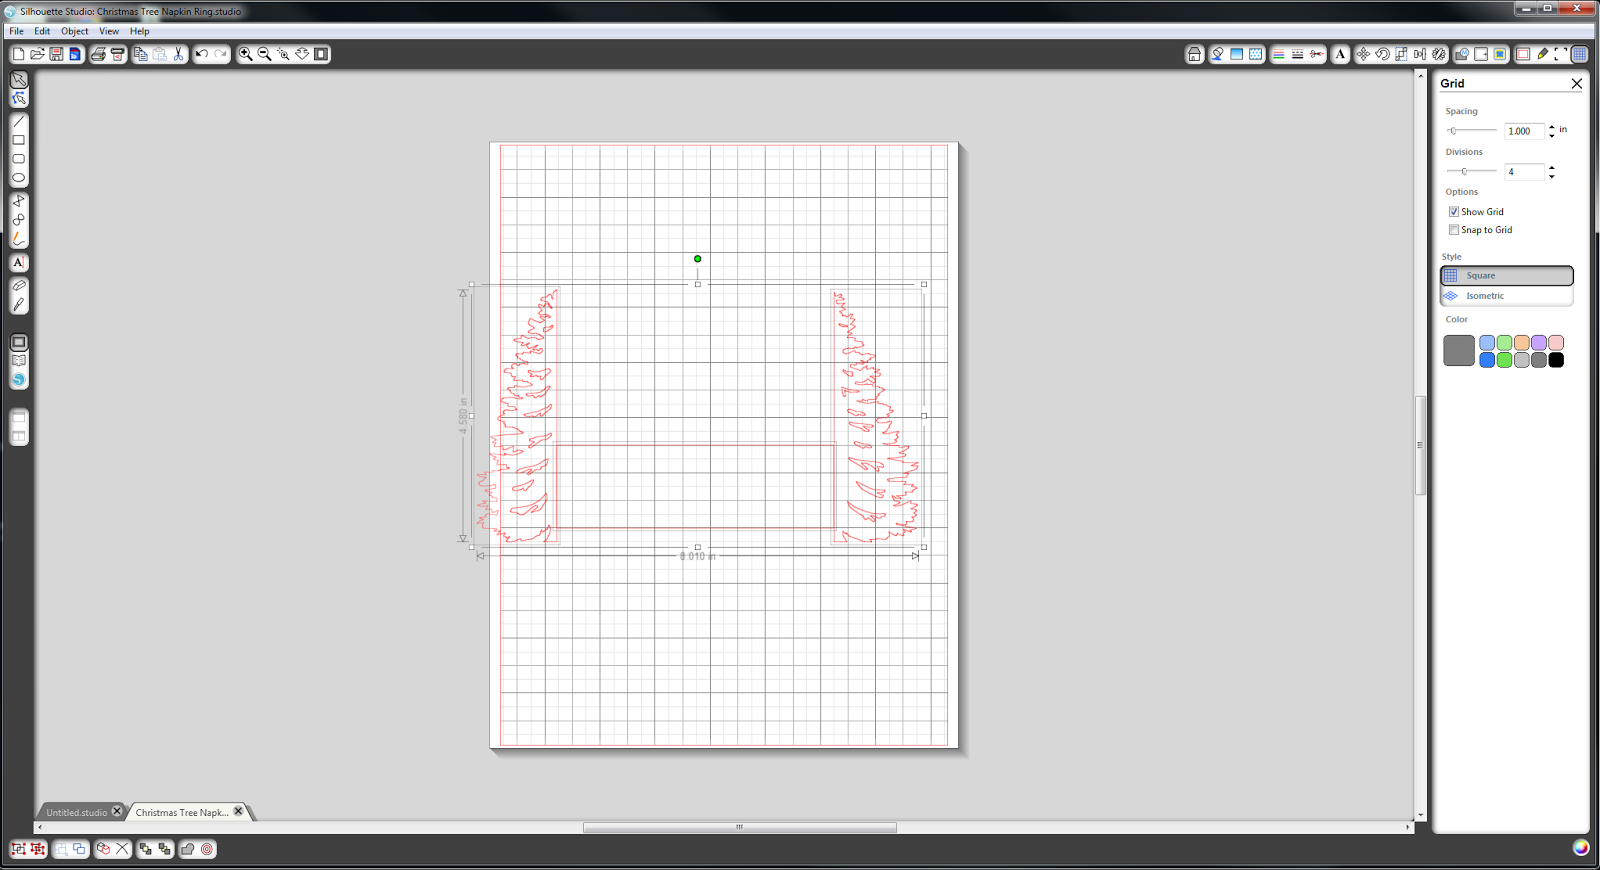
You now have your napkin ring! Last thing you need to do is add slits.

Using the knife, cut a line from one corner of the rectangle to about 2/3 down and the other corner to about 2/3 up.

Now send to silhouette and cut! This project is super simple, but easily impresses guests;)

Like I said earlier, I made two different sizes. The smaller one works for regular cotton napkins, and the bigger one for thicker cloth napkins.
I think this design is perfect for a rustic inspired Christmas!

I would love to see pictures if you make these!
~Kelsey
No comments:
Post a Comment
Please leave a thought or two!